The Original Dry Bag Steak | Make Artisan Dry Age Steak at Home › Forums › Dry Aging Steak › Dry Aging Steak with UMAi Dry® › VacMouseketeers POST HERE!!!!
- This topic has 114 replies, 17 voices, and was last updated 6 years, 4 months ago by
Ron Pratt.
-
AuthorPosts
-
February 19, 2012 at 10:29 pm #1369
Thea
KeymasterLet the games begin!!
February 20, 2012 at 5:32 am #5662Steven Almas
MemberWell, I guess I’ll start things off by introducing everyone to the VacMouse. Maybe once everyone has posted their observations and experiences, Thea could explain where the name came from since there’s nothing really mousy about this thing.
Anyway, here’s what came in the beta test package:

The only thing missing from the photo is the packing slip. That’s it, no instructions or hints of any kind. We were told that this was on purpose as to not sway our creativity in the usage of the VacMice. So in the above photo, there’s a package of 5 VacMice and 3 sub primal drybags.
So let’s look at a VacMouse:


As you can see, it’s 3 strips of thin, breathable, woven plastic mesh. The strips look to be heat fused on the ends to hold it all together.
The first thing I wanted to do is see how wide these VacMice were to the sub primal bags we were sent.

So as you can see, it doesn’t go all the way across, the VacMouse is about 6.5″ wide and the sub primal bag is 12″ wide.
Anyway, I knew coming into this test that the object was to use a VacMouse to successfully vacuum seal a chunk of cow in a drybag using a channel sealer. The reason why drybags don’t currently work with channel sealers is that there is no air path built into the drybags like a foodsaver bag for the channel sealer to vacuum out the bag contents correctly/successfully. I had to assume that the VacMouse would help provide this needed air path and therefore allow a channel vac to work properly with the drybag.
Looking back at my experience with the snorkel vac, suction was never an issue, but I regularly had trouble sealing the bag correctly. The first test I wanted to do was just seal a drybag with the VacMouse in the seal line. If I couldn’t get a proper seal, the whole vacuum/suction/air path thing was moot.
I ran into my first real issue. My foodsaver model is one of the newer vertical styles:


This model has a “Smart Seal” technology that did nothing but peeve me off for these tests. Smart seal is supposed to automatically sense when a bag is inserted correctly into the vacuum channel and then start the suction and sealing process. This was no good for the drybags since they are much more pliable than foodsaver bags and getting them in position to trigger the “Smart Seal” was a bear. Also, trying to position the VacMouse correctly inside the drybag was a whole other issue. After about an hour or cursing at my foodsaver, I hopped on the internet to see if one of the local stores had an older style foodsaver available. Luckily there was one and I hopped into the car to go “Borrow” a foodsaver for this testing.
I came back with this one:

This model is the v2244 and it’s really basic, but I had had enough with the “Smart” foodsavers.
So back to my seal test:

Perfect seal, nice and tight.
So I trimmed off the piece that I had just sealed so I could reuse the bag and I looked at my trimmings. There was a good chunk of the VacMouse that was in perfect shape…I mean, only the melted part was really destroyed, so I cut the VacMouse away from the melted portion and had a piece that was the correct width, but now was half as tall. That’s when the wheels started turning. I figured most people would use the VacMouse the way I used it in the photo above (Maybe I’m wrong) but I wondered how it would work in the other orientation. So I gave it a try:
I placed the strip the long way in the bag and hung a little tail (We are calling these things mice, right) of the material into the channel:
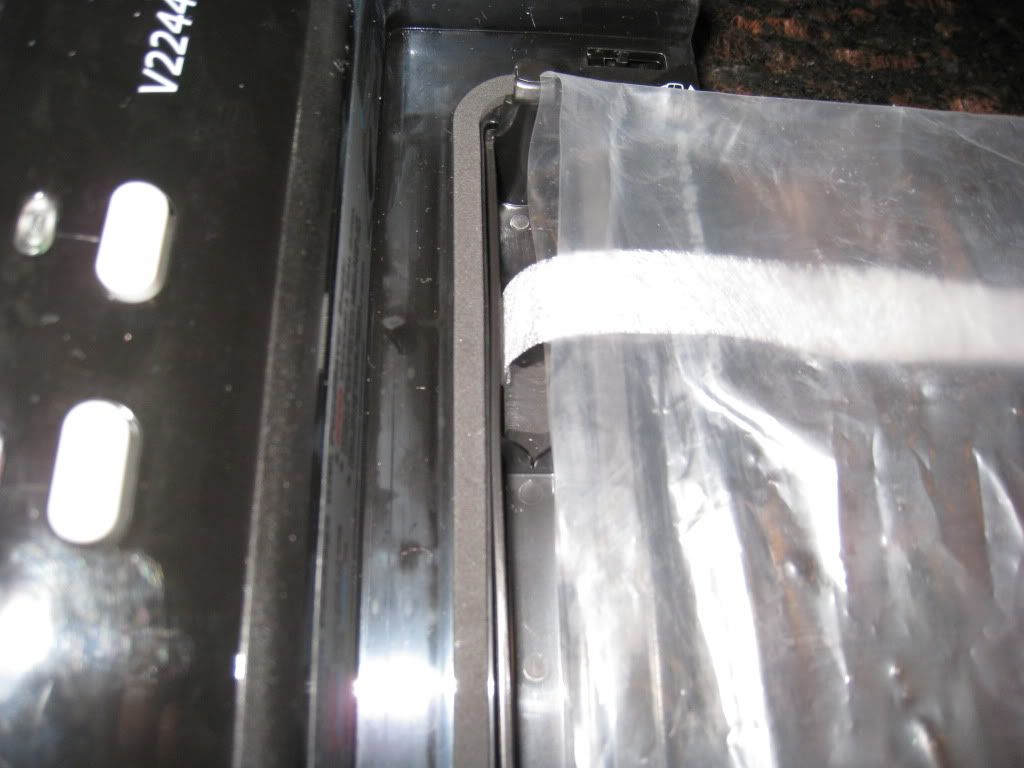
I ran the machine and got perfect vacuum:

As you can see above, I did a double seal.
Test run on water bottles:
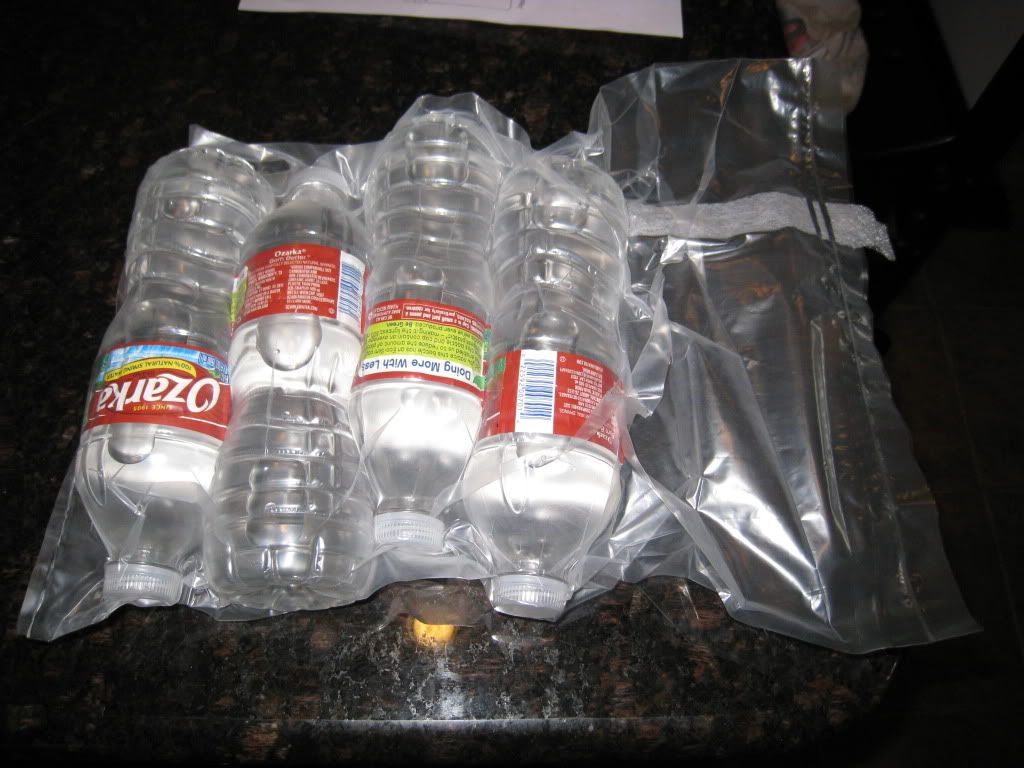
The vacuum was as good as you’d expect from a foodsaver with foodsaver bags. This was also as good as the best vacuum I had ever lucked into with the snorkel vac.
I let the bottles hang out over night to check for leaks and they were still perfect in the morning.
I was feeling good and adventurous, so I decided to go get a NY Strip at CostCo and give that a try.
I ended up with a 12#’er and prepped it as per usual. I drained out most of the liquid in the cryo and slid the sub primal into a sub primal bag. I didn’t trim the bag since I’ve always had better success with a little extra bag to work with. I grabbed another VacMouse and cut it in half the long way (Why waste them if half works). Positioned everything and let’er rip.


I got a really nice vacuum and seal on the strip. The vacuum was close to perfect but you had to work quickly and massage as much air out before the foodsaver goes into its auto seal. This was my first try with the foodsaver and VacMouse and I got as good a vacuum and seal as I normally get with the snorkel vac after much practice. All in all I was very pleased.
Now, some of the things I learned and will apply going forward. In this testing I wanted to only use the VacMouse and no other aides, in the future though, all the old tips should apply. Use pantyhose to help get all the air out ahead of time. The drybag still likes to collapse on itself and if you take too long squeezing/massaging air towards the vacuum, the foodsaver will prematurely start the sealing process. I think using a raft will help keep the bag from collapsing and allow you to get all the air out of the bag. I’d probably position the raft at the end of the VacMouse. It’s late and nothing else is really coming to mind so I’ll leave it at that.
My primal is going on 2 days and the vacuum seal is still perfect. I’m very happy with these results so far. I can’t wait to see what everyone else has done.
February 20, 2012 at 2:42 pm #5663Ron Pratt
MemberWOWSER! Steven! Your write up and pictorial was outstanding! Guess we can see the engineer side of you with clarity! You have set the bar very high for all of us to follow. Ron
February 20, 2012 at 3:52 pm #5664Steven Almas
MemberI can write Lab Reports in my sleep, but I figured we own it to Thea to try and be as thorough as possible. The more we all learn in these test trials, the better the final product. I was going to do some videos, but life called and I needed to tend to the kids. Anyway, this was fun, and in 30ish days, I’ll get to eat my test…not a bad deal.
February 21, 2012 at 4:20 pm #5672Barry
MemberSame here with the vertical “smart” Foodsaver. I am trying to trick the mechanism, but have been unsuccessful so far.
February 21, 2012 at 4:44 pm #5673Steven Almas
Memberaiki wrote:
quote :Same here with the vertical “smart” Foodsaver. I am trying to trick the mechanism, but have been unsuccessful so far.I was able to get it to work, but it’s a pain. What I did was open up the unit, like you’re going to clean out the drip tray, align the VacMouse and bag so the VacMouse “tail” (See my testing) was in the drip tray and the drybag was just short of the vac channel. Then close up the unit carefully so nothing shifts and slowly wiggle the drybag back and forth, moving it forward into the vac channel and the machine would kick off. Assuming, nothing moved around while doing this, it would vacuum and seal…but this was a huge PAIN.
Good Luck.
February 21, 2012 at 5:33 pm #5674Barry
MemberThanks! I tried that and the mechanism wouldn’t kick in. I’ve got another idea in mind, and will probably try it tomorrow.
It would be good to have a manual override on the vertical Foodsaver.February 21, 2012 at 5:46 pm #5675Steven Almas
Memberaiki wrote:
quote :Thanks! I tried that and the mechanism wouldn’t kick in. I’ve got another idea in mind, and will probably try it tomorrow.
It would be good to have a manual override on the vertical Foodsaver.My thoughts exactly…I guess we can’t have everything.
February 21, 2012 at 5:57 pm #5676Barry
MemberYep, but we keep trying for improvement! Glad you were able to work something with the older model.
February 21, 2012 at 9:23 pm #5677Ron Pratt
MemberA foreword might explain my approach to the testing…that is while I came up with a way of using a sleeve of Food Saver bag slipped inside a Drybag and I could seal it, I know from feedback on this forum and personal emails my solution does not work for everyone. Also since I purchased a Sinbo snorkel sealer I had no reason to use my FS for the Drybag sealing anymore. Furthermore for the first few agings I became quite comfortable using the plastic raft that I had made of rigid plastic tubing. Then C~W came along and introduced us to the paperclip bent into a triangle and that trick became my standard method.
With all that said I decided my test admission would be as simple as I could and as quickly as possible! No offense, but I believe some newbies just grab the Sinbo, dump the meat in the bag and then stand back thinking no intervention was needed. As you know failures do occur when the Sinbo is left on its own! In other words could I act like an inexperienced newbie using the VacMouse, a Drybag and my FoodSaver…let’s see…that means never make a practice run – JUST DO IT!!!
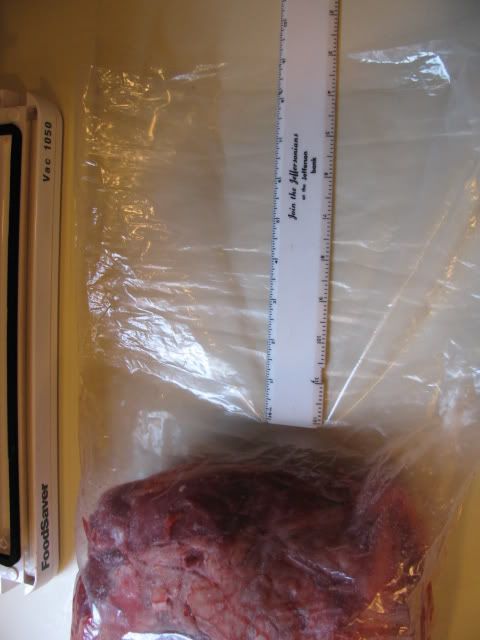
So today I bought a 11.62 pound Loin Top Boneless Sirloin Butt from SAM’s – it looked nice and was graded as choice. It looked like this sitting in front of my older model 1050 FS:
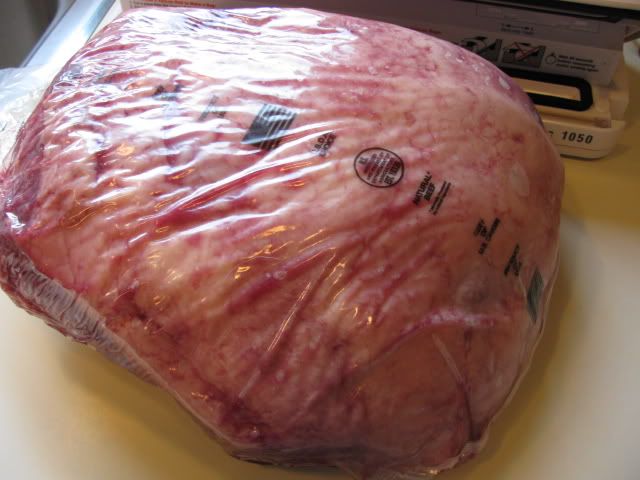
Notice how the sirloin sub-primal resembles a ham in bulk and shape so I knew I might have a tough time getting it in a 12 x 24 sub-primal bag, but finally it got in there – but it was tight! In fact that later proved to be a problem due to trapped air at the back of the bag.
Next being a newbie who might not have read instructions of trimming the excess bag I just left all 9″ excess on like this:
I positioned the VacMouse in the bag, and put the FS in place to start:
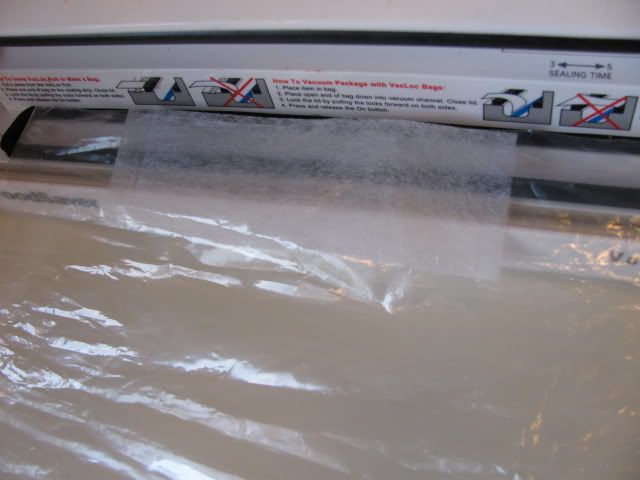
I couldn’t help myself as the FS struggled to suck a vacuum, so I did intervene a little pressing air out. Finally the FS tripped and sealed and then I did a second seal.

There was trapped air after all coming from the back corners so I did not like my results – so I did what I should have done in the first place and trimmed off 5″ of the bag. I then used my second VacMouse and with a little finessing I got a wonderful vacuum and then double sealed it.
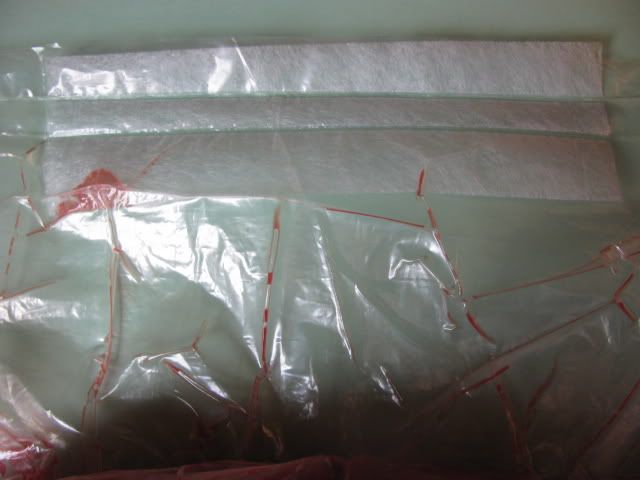
My conclusion is the VacMouse will work for newbies and veterans alike, but like anything practice makes perfect!
Ron
February 22, 2012 at 2:34 pm #5679Andy Starvaski
MemberI received my Vac Mouse testing kit last week and was able to start my testing this past weekend.
Initial Impressions:
I have to say I didn’t know what to expect in my kit, but I was surprised to discover the “Vac Mouse” was a strip of woven material. Over the past year I’ve read on the forum several methods to modify the vacuum process with straws, paper clips, foam blocks, etc and the name “Vac Mouse” brought images of perhaps something more along the lines of an actual device or attachment than a strip of material Perhpas I was thinking of a computer mouse?However, since my orignal, first experience with Dry Bags was an attempt to use my Food Saver with the Dry Bags a-la the much talked about you tube video: youtube.com/watch?v=ytQGVYuHHKg so as soon as I saw the material I knew how to use it, and what it was intended to solve. B)
I had some concerns if I would run into size restrictions. Using the Sinbo sealer, I’ve been able to use the largest bags by sealing a 45 degree flap on each corner. I was concerned that if the bag was wider than my Food Saver tha due to how the Food Saver cover closes, I would not be able to have any have any overhang or use the 45 degree method. I was happy to discover the bags fit the width of my food saver with out a problem.
Off to the store!
My unit is a Food Saver 2840.

We decided to try a 17.34 lb Choice Angus Rib Eye sub primal from BJ’s.

We drained the majority of the blood from the cryo bag and placed the roast into the Dry Bag.

We then placed a strip of the material across the top of the bag and attempted seal the bag.

As when using the Sinbo sealer, we make sure the roast is tucked into a corner of the bag and massage the air out as the sealer draws the air out.

And as other have already reported, the Food Saver system will stop the vacuum and autoseal the bag once it detects a certain pressure. I found the same problem. I wanted a better/tighter bond but the Food Saver had already kicked into sealing mode. I was able to stop the sealing process and re-do the vacum. This time I was very aggressive in massaging out the air, as I knew I had a limted time before the Food Saver went to Auto Seal.

I achieved a fairly decent seal/vacuum and was pretty happy with the results.However when moving the roast to my fridge, I noticed the bond wasn’t as good as I orignally thought, in fact it was pretty poor. I discover that my seal had completely let go!

Fortunatley, the Foodsaver 2840 has dual sealing options. Orignally I left the machine to the “Dry /Normal” setting, but on my second attempt I decided to change it to the “High /Moist” setting. This setting provides a stronger vacuum and a longer sealing time. Using a new strip of mouse material I resealed the roast on the new settings, and once again massaged like a mad man!
It looked like a had a decent bond, and decided to “Triple seal the bag: ie: Once the machine sealed the bag, I slid the bag slightly down and resealed the bag, and repeated it again for a total of three seperate seals.

Overall it looked like a decent seal/bond

I placed the roast in my fridge:

I’ve checked it both yesterday and this morning and the seal looks intack and the bond is as good as with the Sinbo unit!
Over all, I was pleased with the mouse strips (even though I don’t understand the name :silly: ) . I think it’s important that new Food Saver users realize the sealing process will be somewhat different than what they are typically used to with the Food Saver bags. With the Dry Bags, they will have to massage the meat, and understand they wont achieve the typical quick, high quality vacuum that they are used to , It will be slightly less. However, they should be aware that the desired result is more proper bag to meat adheasion and bonding rather than a perfect vacuum.
I also recommend that the Food Saver’s be set to the highest vacuum setting and longest seal time (if the model is so equipped). I also recommend the bag be sealed several times.
I’m not sure which method I prefer, the Food Saver or the Sinbo. The Food saver was quicker and I didn’t have to fool around with paper clips in the snorkel. Sealing is quicker on the Food saver as you don’t have to press down on the bar. And the Food Saver is easer to clean than the Sinbo
However, I’ve mastered the Paper clip trick with the Sinbo and really like that I can vacuum the bag as longs as I please without the machine going into Auto Seal mode. But if meat jucies get into the Sinbo it can get pretty rank, and requires taking the machine apart to clean it out.
Hmmmm. Perhaps another visit to the Butcher is needed? I wonder how I could get the Food Saver to delay it’s auto seal or vacuum more before sealing? Double up on the strips? Use several smalller strips along the edge? a thicker material? I really would like to get a better vacuum on the bag before sealing it.
February 22, 2012 at 3:09 pm #5680Steven Almas
MemberNice review Andy.
I’ve been thinking about the auto seal thing with the foodsaver and I believe you are correct that the machine senses a change in pressure and that’s what trips the seal function. I also think that when the bag collapses on itself, it can cause enough of pressure differential that it’ll prematurely trip the seal function. I have a theory that I haven’t tested yet, but I think will help. First I think trimming the excess bag is much more important with the Foodsaver than the Sinbo since having a lot of extra bagging material just increases the chances of the bag closing down on itself. Second, I think Ron’s FS Sleeve idea may actually be useful in conjunction with the VacMouse. I think if you create and insert a smaller FS bag sleeve just south of the VacMouse, that it will act as a raft of paper clip in the Sinbo. The sleeve will give the drybag some rigidity and provide additional air paths. This is just a thought and I still have to test it, but if anyone out there wants to try it, please do so and report back.
February 22, 2012 at 6:21 pm #5681Andy Starvaski
MemberI just noticed that in my picture of my triple reseal there’s some blood that has drawn up through the first seal and into the second sealed area. Clearly I didn’t have a full seal on the first attempt as more blood was drawn up on the second attempt. The third sealed area looks clean.
 February 22, 2012 at 8:27 pm #5682
Scott Mark
MemberAndy wrote:
quote :I just noticed that in my picture of my triple reseal there’s some blood that has drawn up through the first seal and into the second sealed area. Clearly I didn’t have a full seal on the first attempt as more blood was drawn up on the second attempt. The third sealed area looks clean.I agree entirely in that I think multiple seals are the way to go. That’s using Sinbo style, FoodSaver style, or chamber-sealer style.
February 24, 2012 at 3:13 am #5684Ron Pratt
Memberjust an observation I have had so far…either my old Food Saver model 1050 has had a gasket problem all its life thus producing very narrow, but sharp and deep seals or the newer models have a wider sealing band! Could that be part of the reason we are getting different sealing results?
-
AuthorPosts
- The forum ‘Dry Aging Steak with UMAi Dry®’ is closed to new topics and replies.
