The Original Dry Bag Steak | Make Artisan Dry Age Steak at Home › Forums › Dry Aging Steak › Dry Aging Steak with UMAi Dry® › vacuum sealer hassles
- This topic has 9 replies, 4 voices, and was last updated 10 years, 9 months ago by
Richard schwaninger.
-
AuthorPosts
-
July 26, 2014 at 12:11 pm #2065
Jan Ooms
MemberI am having problems with my vacuum sealer not creating a proper vacuum with the Umai bags. The sealer starts before there is a correct vacuum achieved.
Can I overcome this by using the VacMouse the full width of the bag.
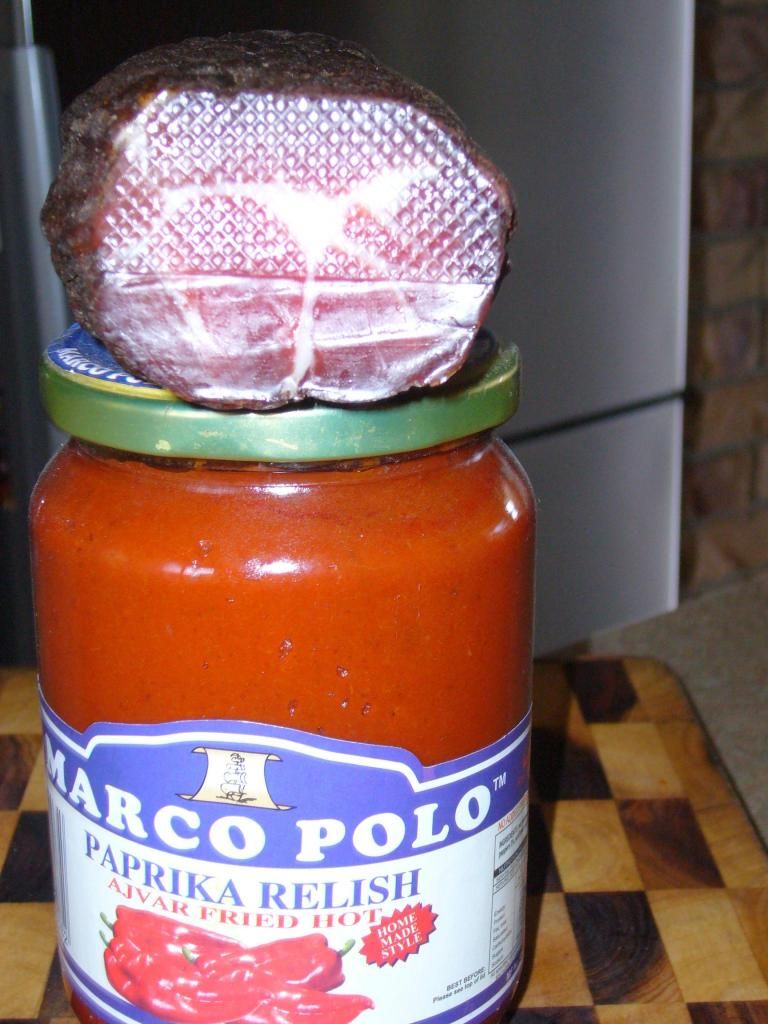
My sealer is very good with the ribbed vacuum bags. I have posted a picture below to show what the Coppa looked like after being vacuumed in the ribbed bag for about 12 hours.
Matter of fact I looking at some Italian vacuum sealers where the vacuum and the timer are adjustable.
Any members with the same problems as me.
Regards,
Jan
 July 26, 2014 at 6:01 pm #8450
Rick
Memberquote crustyo44″ post=5816:I am having problems with my vacuum sealer not creating a proper vacuum with the Umai bags. The sealer starts before there is a correct vacuum achieved.
Can I overcome this by using the VacMouse the full width of the bag.
My sealer is very good with the ribbed vacuum bags. I have posted a picture below to show what the Coppa looked like after being vacuumed in the ribbed bag for about 12 hours.
Matter of fact I looking at some Italian vacuum sealers where the vacuum and the timer are adjustable.
Any members with the same problems as me.
Regards,
Jan

Crusty
I have found that you do need the vac mouse with the UMAi bags to pull a vac on the bags. I also find that if you have a larger UMAi bag, place the vac mouse from one factory sealed edge inward to where the vac mouse stops, then make a corner angle seal there. Then place the vac mouse from the sealed edge to where you made the angle seal and then vac your UMAi bag using the mouse. I see you say your sealer started before the vac happened? Is your sealer the auto start, meaning when you place the end of the bag into the sealer its starts? Remember the vac bags with the cross hatches will draw more air from the bags.
July 27, 2014 at 12:01 am #8452Jan Ooms
MemberHi Rick,
Thanks for your answer. My sealer has 3 buttons like most sealers, one seals the bag, the other vacuums first and starts to seal automatically.
I will have a go at what you suggest and make the corner angle seals first.
If that fails I will have to invest in a sealer that has adjustable
vacuum settings.
It might have to be an Italian job.
Thank you for your advise.
Regards,
Jan.July 27, 2014 at 1:09 am #8454Rick
Memberquote crustyo44″ post=5821:Hi Rick,
Thanks for your answer. My sealer has 3 buttons like most sealers, one seals the bag, the other vacuums first and starts to seal automatically.
I will have a go at what you suggest and make the corner angle seals first.
If that fails I will have to invest in a sealer that has adjustable
vacuum settings.
It might have to be an Italian job.
Thank you for your advise.
Regards,
Jan.Your Welcome
Are you overseas?
July 28, 2014 at 8:43 am #8458Richard schwaninger
MemberHi, I just posted this in the sealer tip and tricks forum.
This may help you.Hi, I just tried the dry bags for the first time. One thing I noticed is that it’s a race between you and the vacuum sealer to see whether you get all the air out before the sealer thinks the vacuum is good and seals the bag.
Here’s what I’d did to give me an unfair advantage:
I opened up the sealer and disconnected the vacuum switch. Now the sealer will continue to run until I decide I’m done massaging out all the air and press the “seal” button. This should work with all vacuum sealers.
Works great, and the modification is reversible. Probably voids the warranty if you tell anyone,I’ll have some more details and a picture or two later this week.
Richard
July 28, 2014 at 3:12 pm #8459Jan Ooms
MemberHi Rick,
I am in Brisbane. Queensland. Australia.Hi Richard,
I am looking forward to your photo’s. What you described on your post is exactly what happens with my vacuum sealer.
If you study the Coppa photo without the bag, you will see that I have plenty of suction with the ribbed bags, the sealer timer beats me every time..Cheers,
Jan.July 29, 2014 at 6:39 pm #8464Richard schwaninger
MemberHi, here’s the full version with links to photos.
I recently decided to modify my vacuum sealer so that I no longer am dependent on the automated sealing feature. The sealer I use for the Umai dry bags is a Foodsaver V2244, a pretty basic model.
This vacuum sealer has the pretty much standard controls. One button starts the vacuum and then seals automatically. A second button either stops the vacuum and seals the bag, or simply seals the the bag (for adding a second seal or making bags from the roll material). Some units have more controls, but all should have these two basic functions.
These sealers have a pressure switch which controls when the vacuum is stopped and the seal is made. The assumption from the manufacturer is that the bag has the small channels embossed into the bags which allows the air to escape. The Umai dry bags don’t have these, so occasionally, or more frequently even, the bags form enough of an air tight seal just beyond the unit to allow the pressure switch to actuate the sealing step even though there’s still air in the bag.
Remove, or disable this switch and the vacuum pump will run continuously until you press the seal button. This will allow you to take the time to massage the air out of the bag and make the seal when you are satisfied wit the degree of air removed from the bag.
Of course you loose the automated vacuum sealing feature and probably any warranty you had on the unit.
Removing the switch on my unit was quite easy. Once the unit was opened by removing the bottom there was easy access to the controls. There’s not much in these units. A vacuum pump, a pressure switch, some tubing, a small electric control circuit to time the sealing bar heater/pump operation.
On this unit there is a small tubing which runs from the vacuum pump to a “T”. From the “T” the tubing continues the the sealing chamber as well as a vacuum switch.
Now, here, there are two ways to disable the automation:
1. Remove the vacuum switch from the vacuum tubing altogether. This is what I opted for since this unit is dedicated to dry bags.
2. Add a toggle switch to the circuit which effectively removes the vacuum switch from the control circuit. The toggle switch would let you choose between manual or automatic vacuum/sealing. This may be a better (albeit more work) choice if you use the unit for regular kitchen duty as well as for the dry bags. Depending on the sealer and how the vacuum switch is incorporated it may require some soldering on a circuit board.Of my unit preventing the switch from being used was simple. Since the tubing from the pump goes to a “T”, and there was enough tubing to to go straight from the pump to the sealing chamber – I simply removed the tubing from the “T” and connected the pump directly to the sealing chamber. The vacuum switch is still in the unit but no longer connected to the vacuum pump. When using the unit the switch never sees vacuum and so the pump will continue to run until you initiate the seal, or the pump overheats.
You still need the vac-mouse to keep some flow across the unit’s gaskets.
A lot of words for a 5 minute job, here are some photos:
Before:
https://www.dropbox.com/s/waurz1ccl5zge97/Photo%20Jul%2028%2C%2021%2023%2014.jpgPreparing to open the unit:
https://www.dropbox.com/s/1urssefbk4nvb96/Photo%20Jul%2028%2C%2021%2028%2053.jpg
https://www.dropbox.com/s/gl6q426rwrhfku6/Photo%20Jul%2029%2C%205%2047%2051.jpgOpen and ready to perform modification:
https://www.dropbox.com/s/4ygylwcdvv01wb2/Photo%20Jul%2029%2C%205%2043%2035.jpg
https://www.dropbox.com/s/oiwroxnucdm1qke/Photo%20Jul%2029%2C%205%2054%2040.jpgModified:
https://www.dropbox.com/s/uz19rvo7u5t21lj/Photo%20Jul%2029%2C%206%2019%2008.jpgClosed back up:
https://www.dropbox.com/s/3vjfbfiugtynp44/Photo%20Jul%2029%2C%206%2002%2054.jpgI hope this was helpful. Other units are certainly going to be different but the idea should work on all the automated vacuum sealers.
Richard
July 30, 2014 at 12:21 am #8468Jan Ooms
MemberHi Richard,
You have spent a lot of time on this post and the photo’s.
There will be a lot of grateful members including me obviously.
THANK YOU!!!!!!!!!!!!!
Cheers,
Jan.July 30, 2014 at 2:52 am #8469Phil
MemberRichard, thanks for being a tinkler – what a simple mod that will surely improve satisfaction whilst sealing a UMAi bag!
PhilJuly 30, 2014 at 9:41 am #8470Richard schwaninger
MemberYou’re welcome. I hope it makes managing the sealer a bit easier.
Cheers,
Richard
-
AuthorPosts
- The forum ‘Dry Aging Steak with UMAi Dry®’ is closed to new topics and replies.
